Panorama Photos from the Fort Stanton Cave Study Project
Panorama Photos from the Fort Stanton Cave Study Project |
Celebrating the Discovery of Snowy River 19 years ago!
This section features some experimental panorama photographs from members of the FSCSP team starting around 2011. As we are able to continue our work on the Caver Quest simulation, on occasion we have taken some of the more "standard" azimuth panoramas in the cave. We started Caver Quest in Snowy River using a Nodal Ninja 3 pano fixture to take "horizontal cylinder" sets of photos for the CQ Wallpaper. It is a simple switch to taking an azimuth panorama (vertical cylinder) using the same equipment. However it requires different lighting control, especially in Snowy River where we have a long narrow passage heading south to north with the distant points usually in total darkness and the western and eastern walls relatively close, sometimes within arm reach. (If you expand your screen view to 1200 pixels you should be able to see the whole photo.) Jumping forward to 2020, we are using photogrammetry techniques to support Caver Quest improvements, and our photo archive of the cave includes more that 70,000 digital photographs. In 2018 we improved the original photo process in the cave by almost an order of magnitude when measured by time spent in the cave compared to the results. We have tried three generations of inexpensive LIDAR units in the cave in addition to a professional high resolution LIDAR in 2009. (Unfortunately the professional LIDAR data processing was never completed, which explains our interest in caver-built LIDAR units.) The photos shown below on this page were all taken with tripod-mounted DSLR cameras using radio slave operated strobe units. Our newer 2017 technology uses caver-built LED photo lights with higher senssitivity DSLR cameras that allows better photos that can be more quickly stitched following a more efficient in-cave process. |
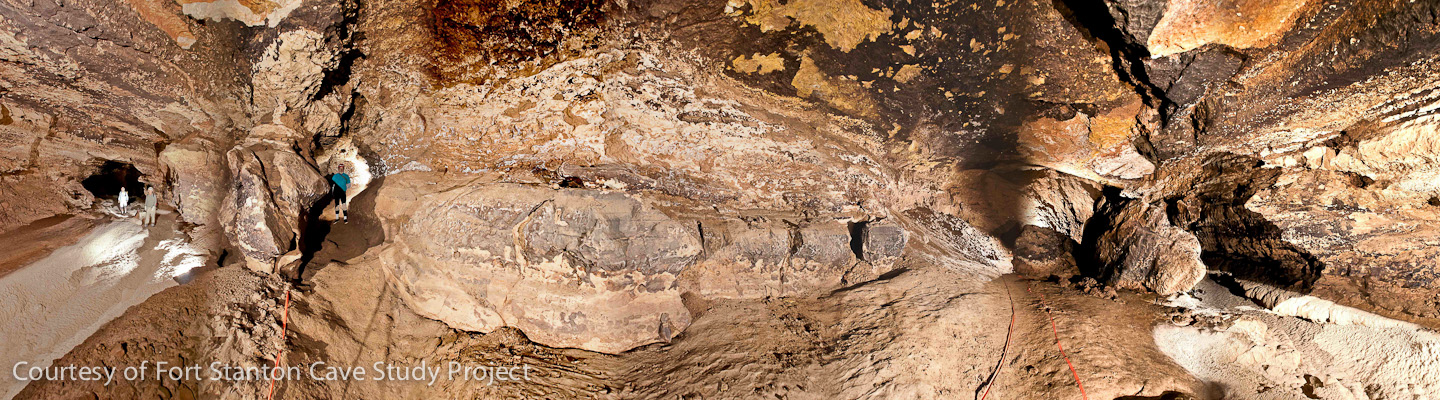
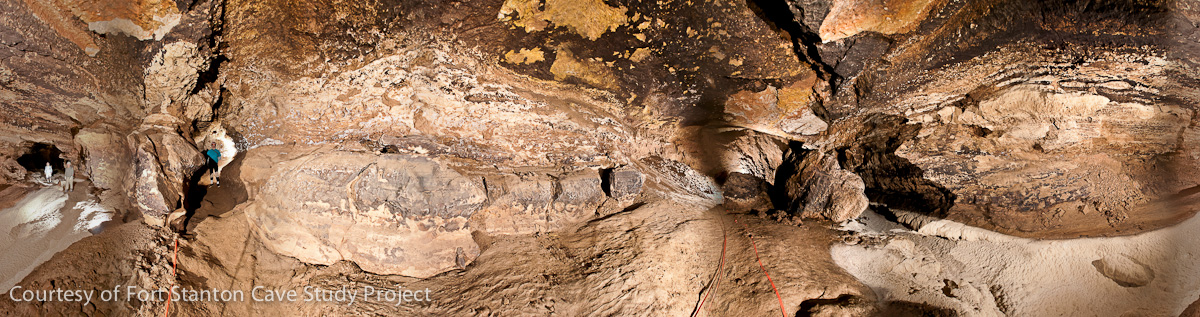
On September 1, 2001, when Snowy River was discovered, this was the area that was first seen by the members of the dig team consisting of Lloyd Swartz, John McLean, Don Becker, and Andrew Grieco. If you were a tiny bug on the far eastern wall with a very bright light this is what you may have seen. Pictured in this July 12, 2013, blending of photographs is a 300 degree panorama looking at the west wall in the center. Three of the four members of the Caver Quest photo team are shown in this photo: left-to-right are Rob Wood, Ron Lipinski and Wayne Walker. The darkness behind Rob is where Snowy River heads south for another 10 miles. Wayne, in the green shirt, is standing in the joint-controlled passage that leads back to the Priority 7 dig through crawls and tight spots. |
The original explorers marked the pristine floor with orange plastic tape to guide future visitors along the unique path. On the right side of this view Snowy River winds around a large boulder and almost immediately the ceiling drops down to within a few inches of the surface of the white calcite floor. Fortunately it did not cut off Snowy River and after 100 feet the passage regains its height and continues into the distance. The black manganese coating on the ceiling is typical of much of Snowy River where the microbiological forces are at work slowly eating the limestone layers. If you click on the picture below you will be able to see an 11 MB version of this area that can be zoomed so that you can view the detail that will also be visible in future versions of Caver Quest. P. Lindsley Photo. |
 |
The image below is actually a 360 degree panorama. You can download a low resolution (4 MB) or a high resolution (18.4 MB) ".mov" file for viewing on your screen by using your mouse to scroll the image. If the panorama is not working on your computer, try downloading the latest version of QuickTime HERE. |
 |
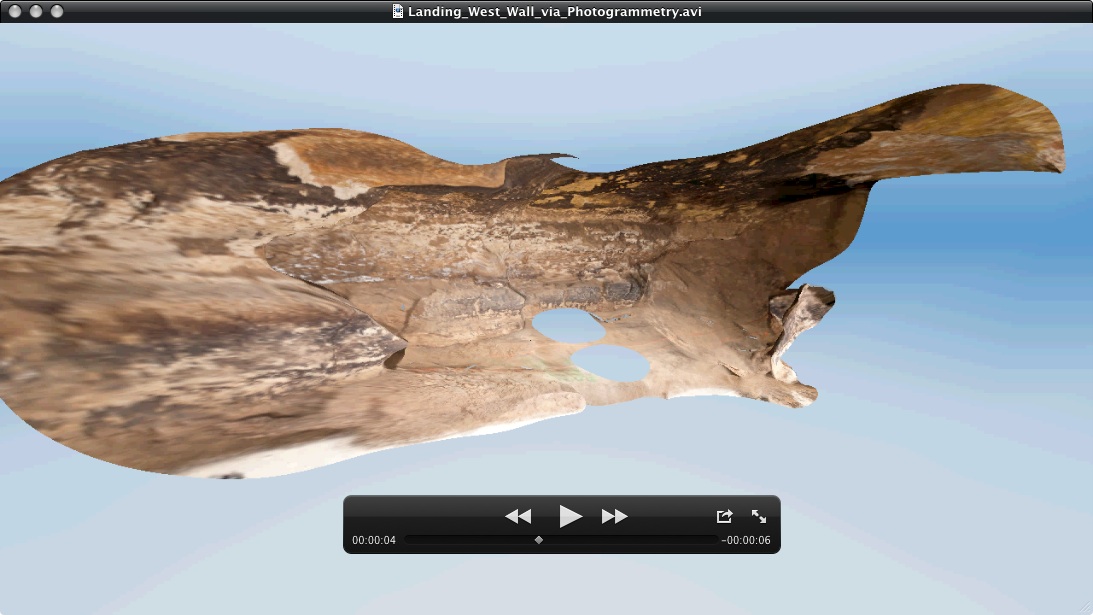
The image on the right is the result of a process called photogrammetry which has been used to generate 3-D views of an object by combining a minimum of three views from different angles. The semi-automated process requires overlaps of 60% in the photos used, and a larger number of photos when rendering something as complex as a cave passage. We will continue to experiment with this process which should be particularly valuable in displaying such objects as fossils and tiny aragonite formations. Click on the picture to the right to download an avi file that will better demonstrate this technique on your computer screen. |
|
|
Your results on viewing this example of photogrammetry at this location may vary depending on your computer. Check back later for more information on a iprocess that will offer better display of 3-D content on your computer or hand-held devices. |
||
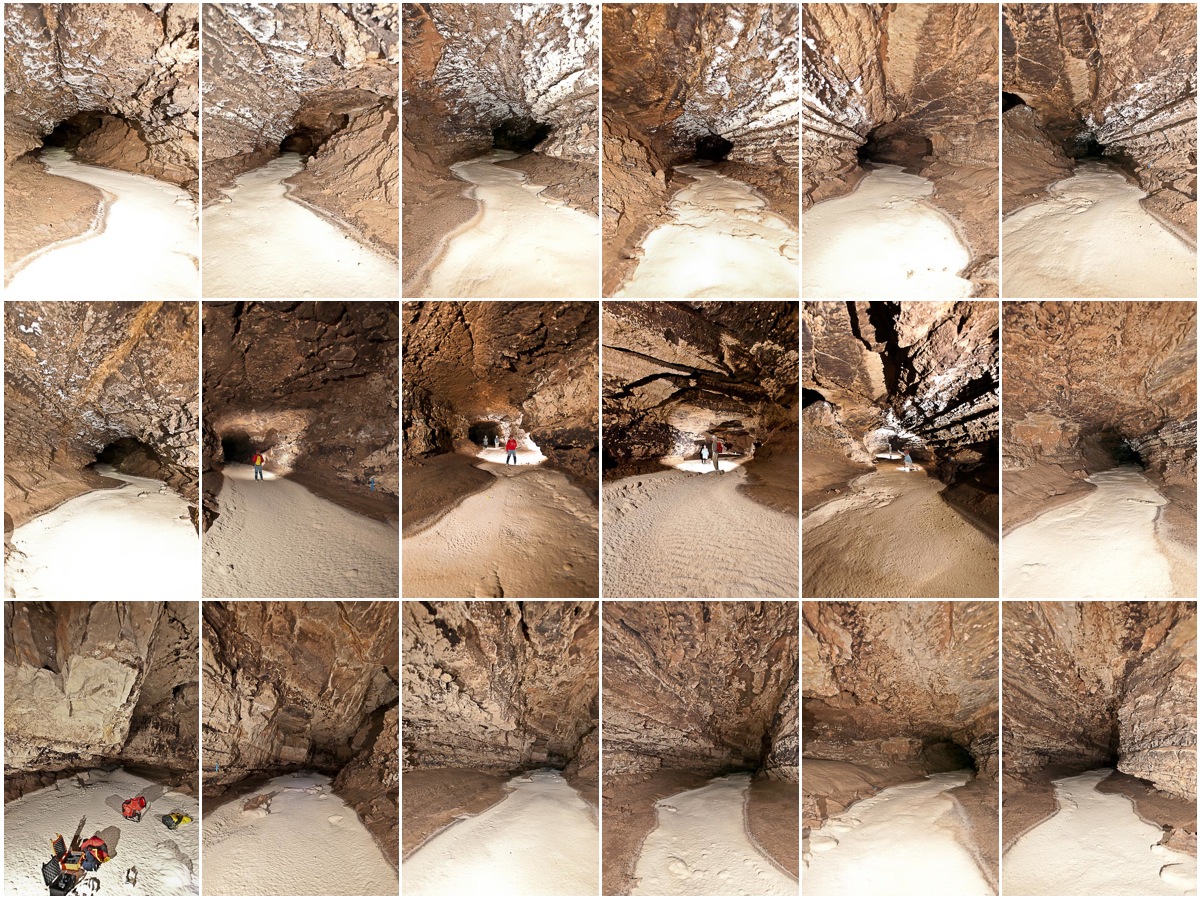
During the Caver Quest wallpaper photo process we sometimes take passage shots looking upstream or downstream to take a broad view of the area that we record in detail with 5 foot tripod increments down the passage. On occasion we also take the time to place members of the photo team down the passage for scale. |
 |
![]()
Rev. 3-4-2020 |
Comments to the webmaster |
Contact the FSCSP President |
Contact the Project Director |